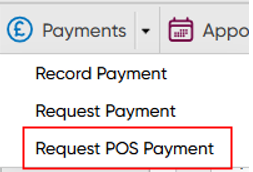
Taking a Point of Sale Payment via the Payment's Menu
- Once in a Merlin client record, click on the dropdown arrow at the side of the payments button and select Request POS Payment
- . You are now presented with the Payments box.
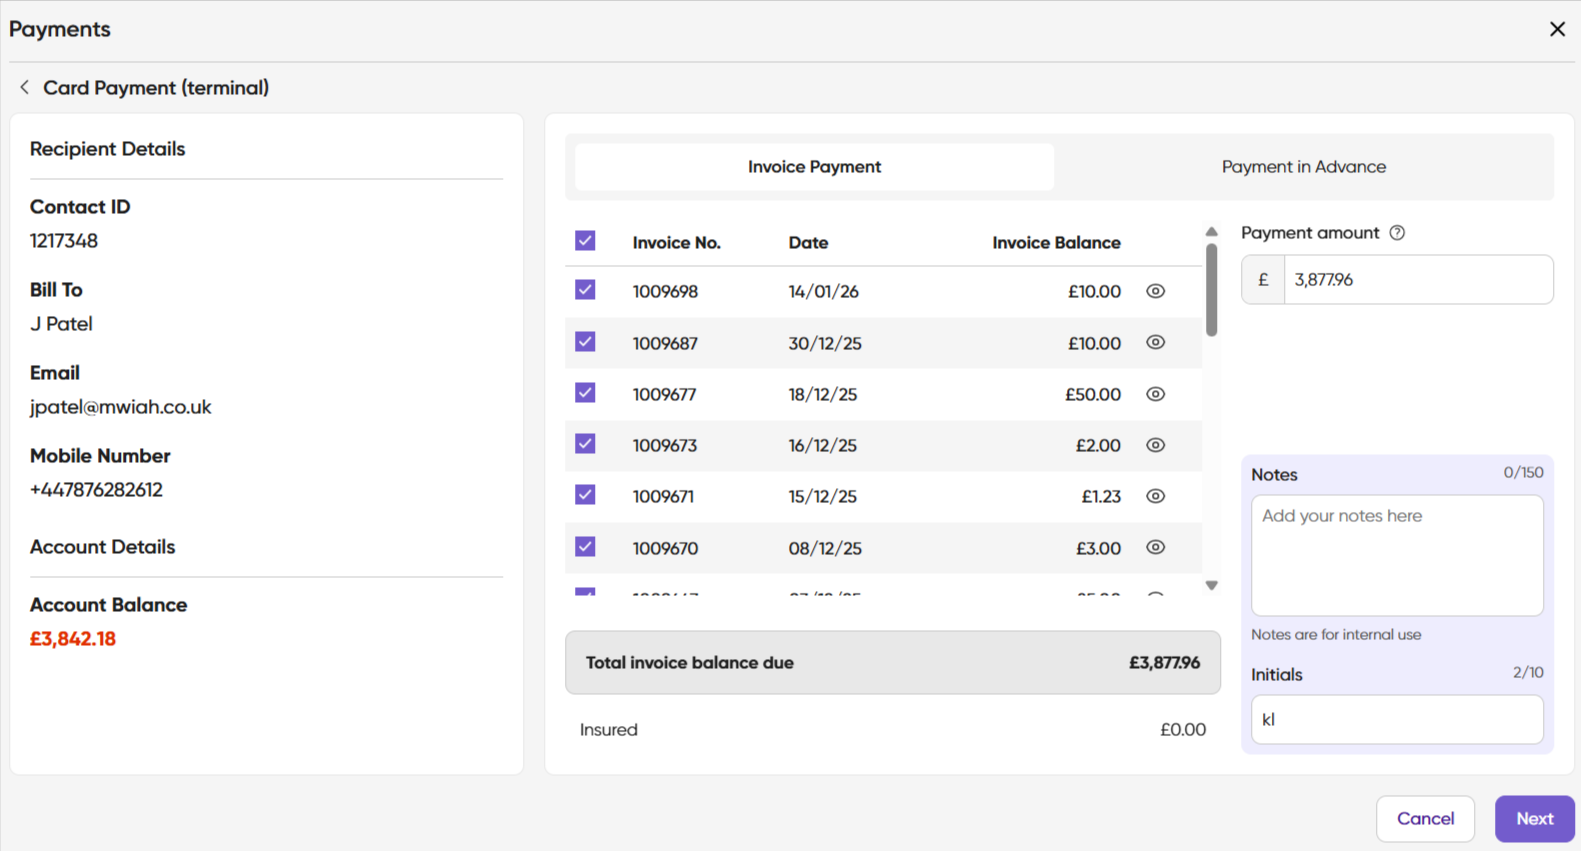
- At this stage you can select to either process a card payment against a selected invoice or click the other tab to process a payment in advance. Point of Sale Advanced Payment

- The client details will pre-populate the form. Check that you have the correct details for the client by checking the details displayed in ‘Contact ID’ and ‘Bill to’.
- By default all outstanding invoices will be selected.
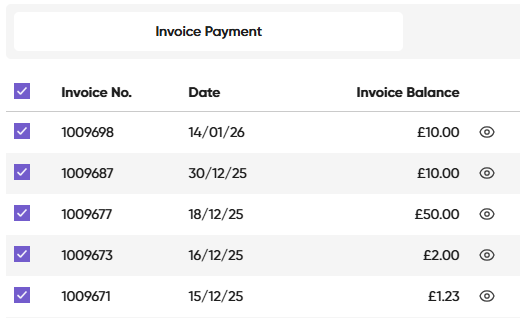
- Select the invoices you would like to request payment against, using the tick boxes. If you record insurance against line items in Merlin, these will automatically be calculated, so you can quickly understand which items are covered by insurance and will show at the bottom of the screen as Insured amount.


- Total invoice balance due will display the total balance of the invoices selected
- Insured and uninsured - please note that these calculations do not consider any payments that have already been made against invoices. They are presented to give guidance on items that are covered by insurance whilst taking a payment
- Uninsured amount – Total of any invoice line items that are not recorded as covered by insurance automatically calculated at an invoice level
- Insured amount - Total of any invoice line items that are recorded as covered by insurance in Merlin, automatically calculated at an invoice level
NB The Payment amount can be amended if required.
7. If you need to check the invoice details then you can select the 'eye' at the side of the Invoice Balance. 
8. Add any internal notes, input your initials and select Create Link 
9. You are now presented with a Payments box - Card Payment (terminal)

10. By default the assumption is the customer is present, if the cardholder is not present please click the slider button which will set the terminal into "cardholder not present" mode:
11. If you have more than one terminal ensure you select the correct one from the dropdown options.
NB Terminals connected via the integration are displayed by their Terminal IDs in the Merlin payments window. For setups with multiple terminals, you can select your preferred terminal. To simplify this process, we’ve introduced the ability to name terminals, making it easier to identify and choose the desired terminal. 
12. Now select Request Payment to send the payment amount automatically to the terminal: 
13. The terminal screen will display and indicate to you the stages of payment processing. Once the payment is completed you will see the following notification. If it is declined you may have the option to retry or ask your client if they have an alternative payment method. If you require a receipt select Send Confirmation Email.
14. Once the payment is received the client's Merlin account will be automatically updated as paid and details will be recorded in the Daily Cash Report.

